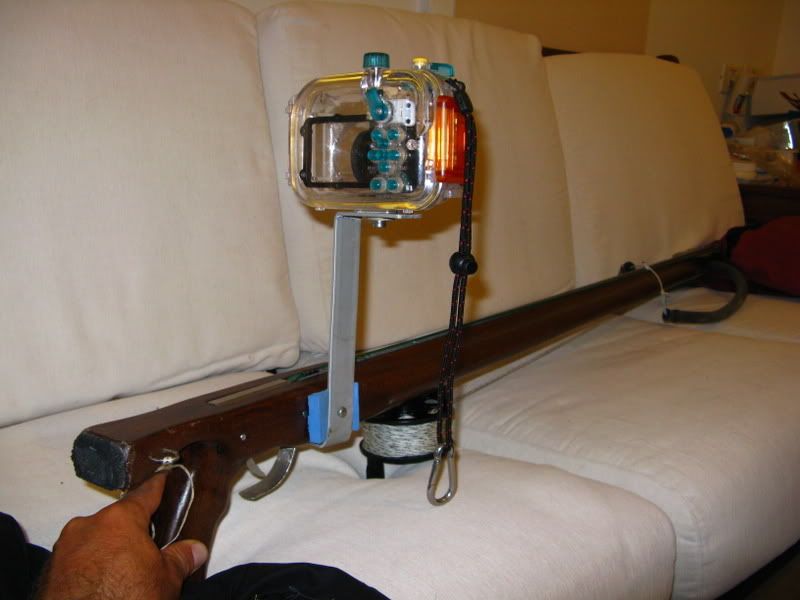
Thursday, August 28, 2008
Thursday, August 21, 2008
My new speargun's first test
Yesterday I managed to spare a few hours to test my new wooden speargun in the water.
The sea was calm, but visibility was quite poor. I dove to a reef 8m deep, and ambushed visiting predators.
The first nice fish to come was a Yellowmouth Barracuda, around 80cm long. it was swimming towards me, and I noticed it had a crank bait on its lip. I shot it from below, hitting right in the middle, and got 2 for 1 shot (the fish and a new crankbait)...
Later I missed one small Trevally that tore itself off the line. Just before I climbed back to the kayak, a nice Shi Drum arrived, and I shot it straight in its profile.
I gutted the fish on the kayak, and put them in ice.
It was a great lunch before the evening trip ;-)

Wednesday, August 20, 2008
Nice, calm sea
Today and yesterday we enjoyed a calm sea, after almost a month full of waves.
The calm sea drew many kayakers to Rami Gil's club, and we took every kayak available, including the tandem kayak. Rami and Nava practiced eskimo roll with the tandem kayak:
All the rest of us just enjoyed the beautiful day and the conditions were perfect to take some pictures:
The calm sea drew many kayakers to Rami Gil's club, and we took every kayak available, including the tandem kayak. Rami and Nava practiced eskimo roll with the tandem kayak:
All the rest of us just enjoyed the beautiful day and the conditions were perfect to take some pictures:
Sunday, August 17, 2008
Wooden Speargun
Hi,
I haven't posted in a while, being busy in quitting my job, looking for a new one, and specially working on my latest project - my first wooden speargun.
I've been working on it for about 6 months, and I really love the result.
It's made out of Teak wood, that was sliced into 5 strips and then glued back together in opposite directions, for added rigidity and to avoid warping of the wood.
Then I made measurements, ordered trigger mech and spear.
Once I had them I used a router to cut out the spear's rail and trigger pocket.
Then I carved the handle from another piece of wood and glued it to the wooden block.
That was the easy part.... After that I started carving the wood, using manual tools: chisels, plane and a wonderful tool called Surform by Stanley (a plastic plane with replaceable blades).
That part took me a couple of months. Once I was satisfied with the result I designed and made the metal parts - line holder, trigger guard, handle bottom. All was cut and prepared from a stainless steel sheet using a Dremel tool.
It was then time to get it wet. I took the speargun to the sea, to measure how much weights it needs to be balance in the water, and to check if it can really shoot the spear.
The final part was applying 4 coats of epoxy mixture to protect the wood from water and bruises, and finally, 3 coats of yacht varnish to protect from UV.
I used epoxy mixed with graphite powder for the spear's rail to offer better protection and less friction.
Sorry for not sharing as the work took place, but it was too slowly and not documented enough.
The result however is right here :
Subscribe to:
Posts (Atom)


